
Top ten surgical tips for DA Hip Replacements
These surgical tips and tricks are my favorite surgical tips for direct anterior (DA) hip replacement surgery that I have learned over the years. Many surgeons may know some of these tips, but I imagine every surgeon will learn something. These tips are listed according to when they typically occur during surgery.
Please share your favorite surgical tips in the comments section below.
Acetabulum and Greater Trochanter Bone Markers
I use the metal markers (Fig. 1) from my previous robotic cases to measure the distance between the acetabulum and the greater trochanter during my DA hip surgeries. I put one marker in the outside rim of the acetabulum and one in the greater trochanter before I cut the femoral neck. At this point in the surgery, I also remove the short-tip bovie and replace it with the long-tip bovie. I use the short-tip bovie to measure the distance between these two markers. I place the end of the short-tip bovie in the acetabular marker and then bend the flexible end of the bovie so that the bent bovie measures the distance between these two markers. At the end of the case, I place the same short-tip bovie back in between these two markers and measure the distance between these two markers again. This change in neck length does not distinguish between changes in offset and changes in leg length, but it is very accurate in measuring the change in overall neck length. The surgeon must remember to remove the markers at the end of the case.
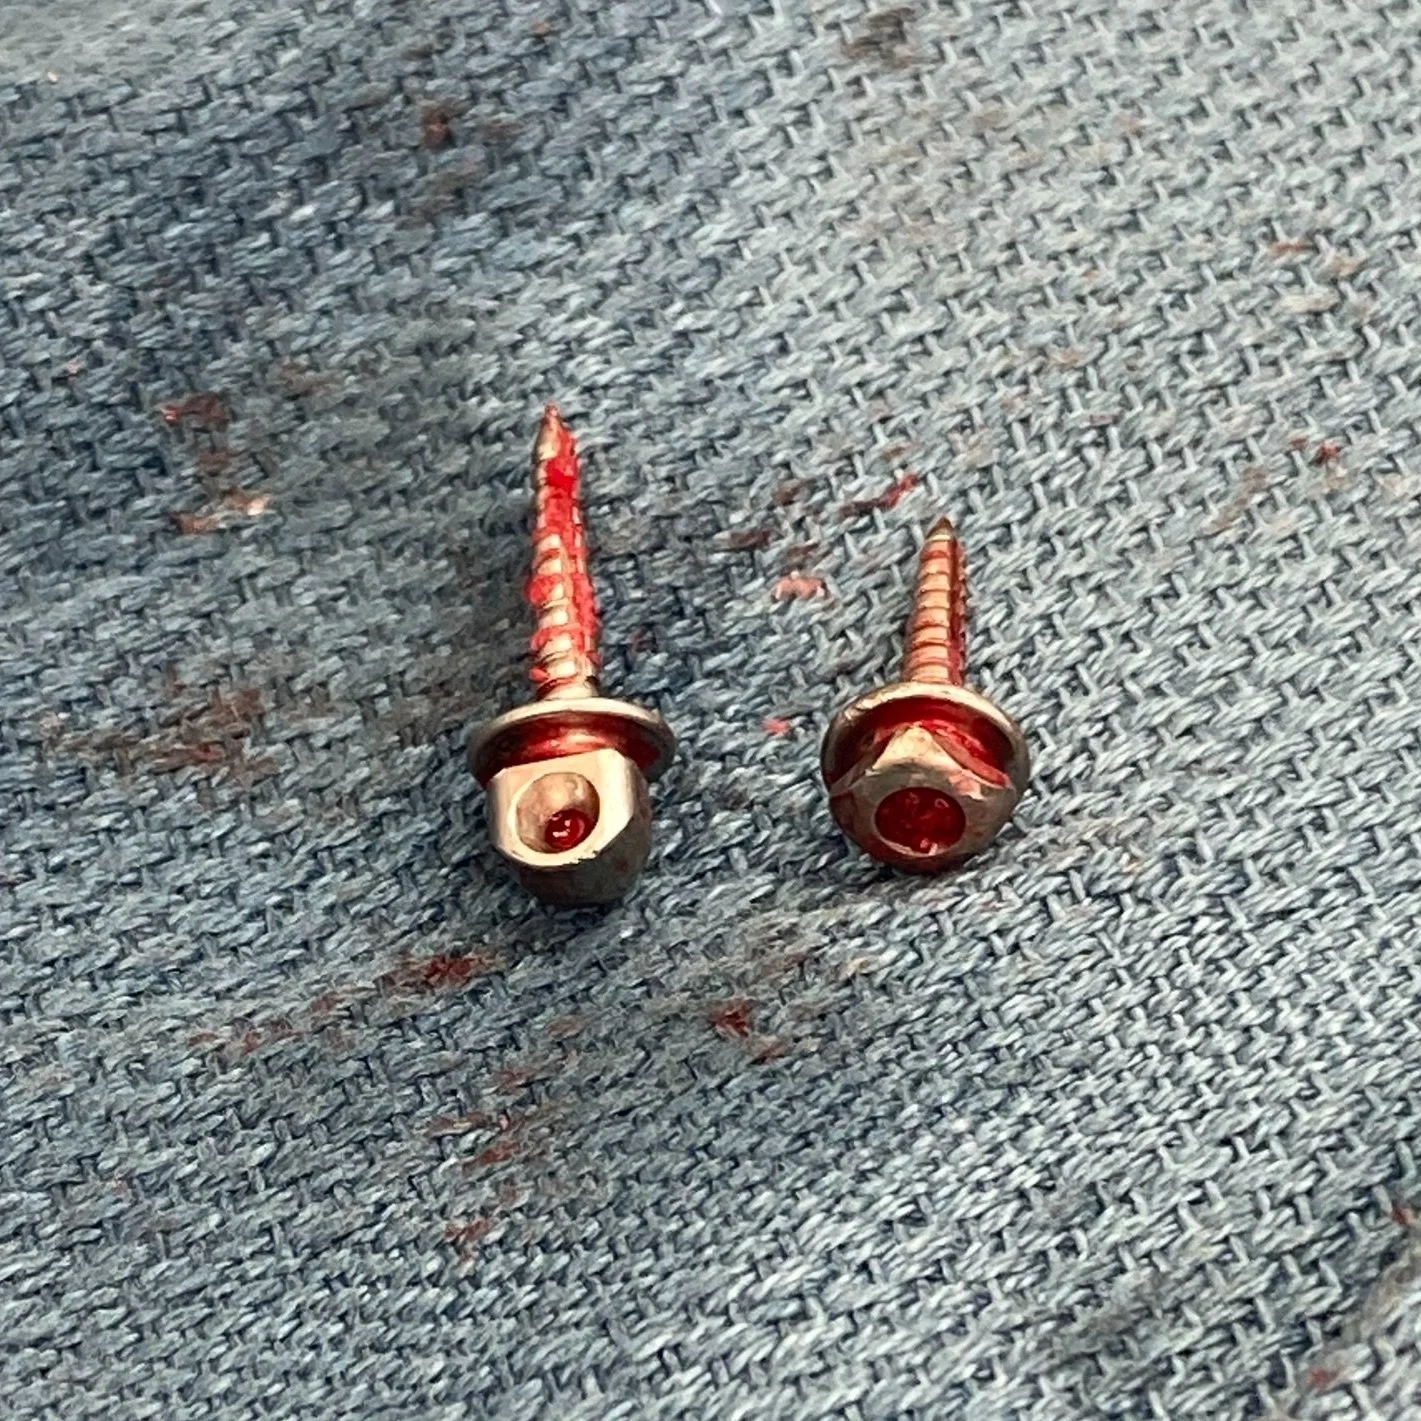
Fig. 1 - Bone markers

Fig. 2 - Fluoro image of Bone Markers and saw blade
Provisional femoral neck cut; then Fluoro with saw blade
After I expose the femoral neck and insert my bone markers, I make a provisional femoral neck cut with the saw blade. I detach the blade from the saw and leave the blade in the femoral neck cut. I then get an initial fluoroscopy image (Fig. 2) that shows where my neck cut is in relation to my templated neck cut. If I plan to cut a napkin ring out to facilitate the head removal, I can either make the second cut above or below my initial cut.
I complete the femoral neck cut with the saw blade until the two sides of the neck cut separate. Surgeons should avoid using an osteotomy to pry apart the femoral neck because levering open the osteotomy site can cause a femoral calcar fracture.
Return leg to the same position for leg length measurements
An accurate leg length measurement is predicated on having the leg in the same position for both the initial measurement and the post-implantation measurement. This is true for both radiographic and manual measurement.
I want to share a quick story about a surgical tip that proved to be completely unnecessary. I initially bought a ~$20 laser gunsight for a pistol (Fig. 2) and attached it to the Hanna table (Fig. 3). I projected a laser mark on the far wall at the beginning of the surgery and verified that the leg returned to the same position at the end of the surgery.

Fig. 3 - Laser for pistol gun sight
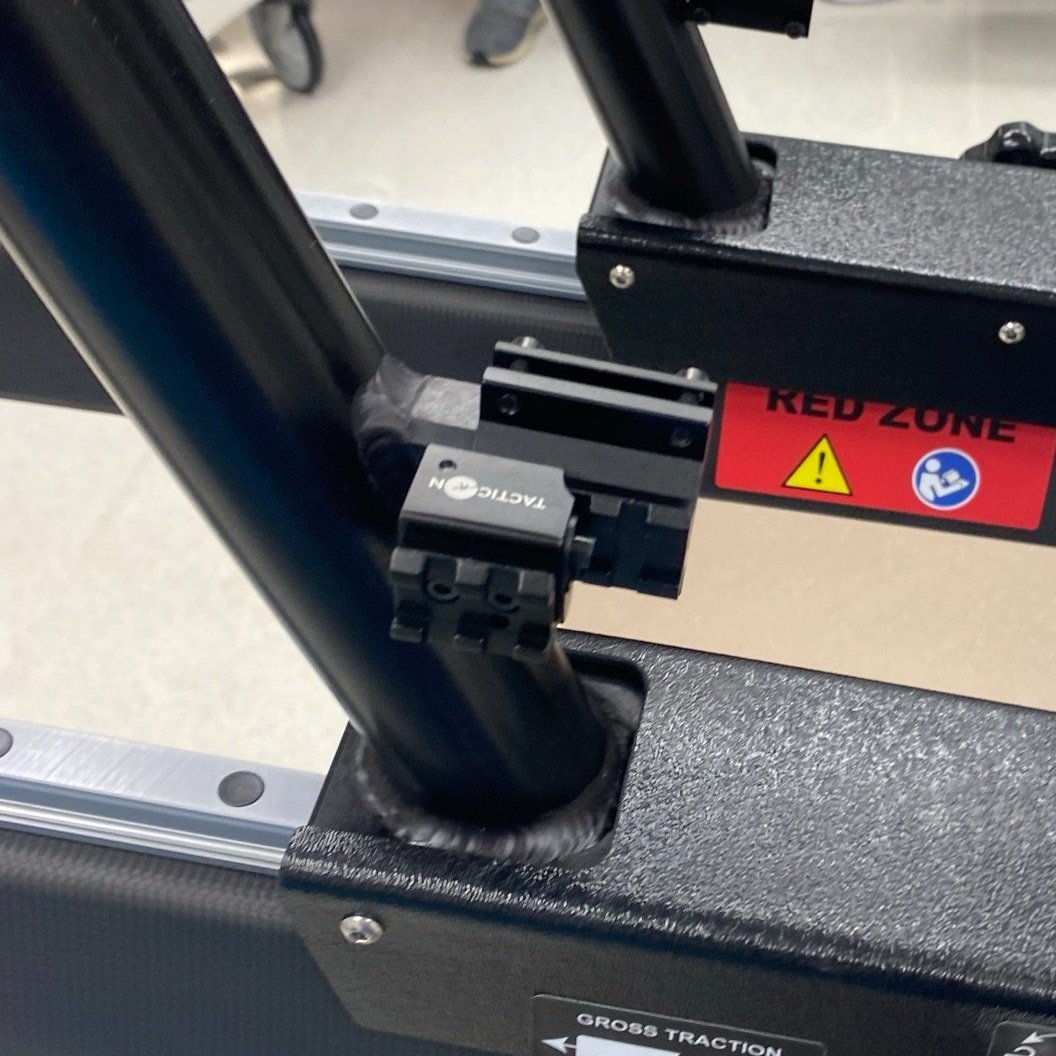
Fig. 4 - Laser attached to Hanna Table
I also experimented with using a self-leveling laser (Fig. 5) that one might use to hang pictures. I attached this self-leveling laser to the Hanna boot and projected the laser line onto the other boot as well as the wall.

Fig. 5 - Self-leveling laser attached to Boot
While it was fun turning the operating room into a laser light show and having the OR staff quote the Russian lady in Austin Powers (Fig. 6), this laser technique was unnecessarily complicated and not accurate because the patient moves on the bed during the surgery.

Fig. 6
I now use a far simplier way to ensure that the operative leg is in the same position for pre- and post- measurements. The Hanna table handle for the non-operative leg can be used as a reference position for the operative leg. I now just ensure that the two leg handles on the Hanna table are touching at the beginning and end of the case. (Fig. 7) I make sure the OR staff does not move the non-operative leg between the initial and final leg positioning.
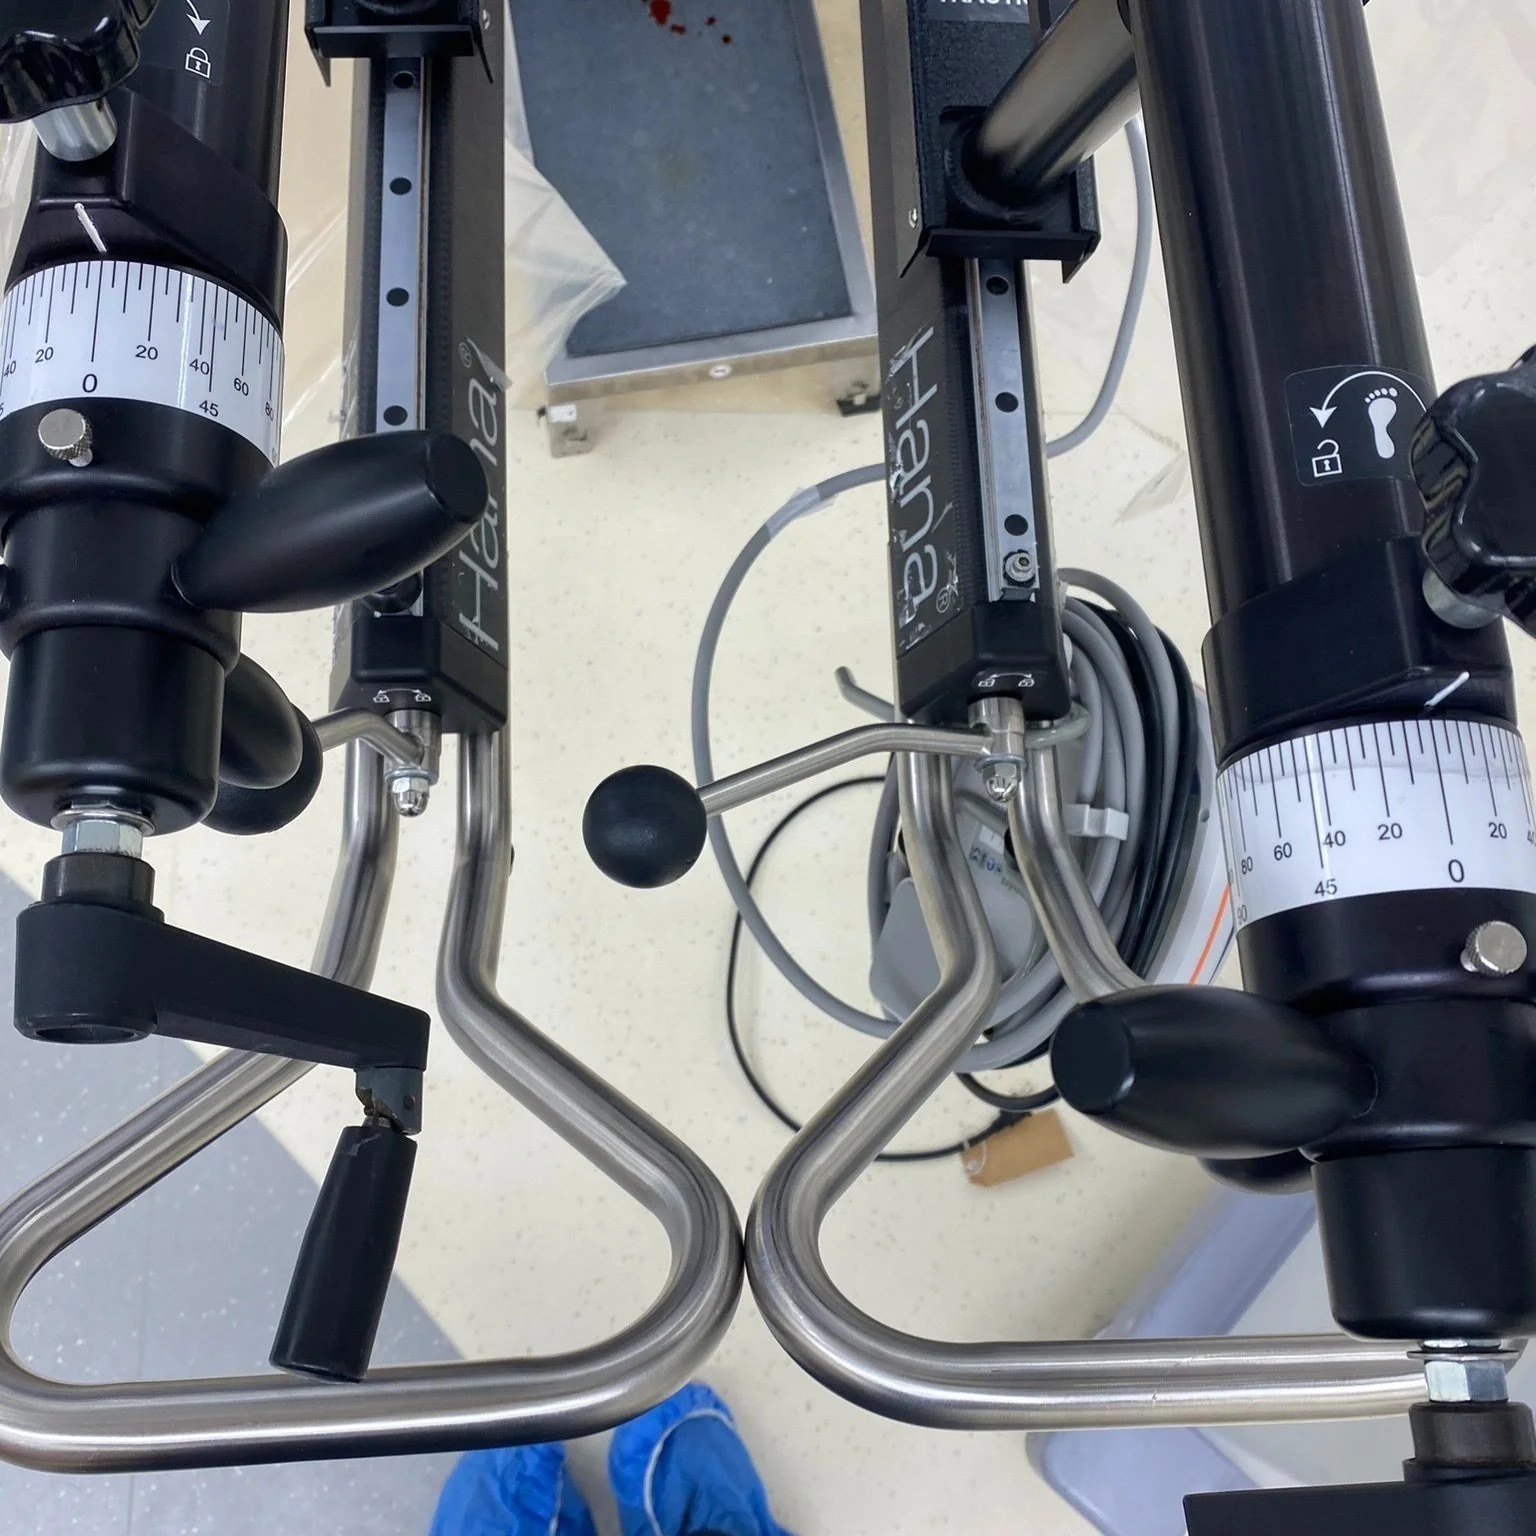
Fig. 7 - Hanna table with handles touching
Acetabular Component Diameter = Femoral Head + 5 mm
I still templated the patient’s pre-operative x-ray, but our radiographic tools that correct for x-ray magnification and predict the component size have a 5–10% measurement error.
Selecting an acetabular component that is 5 mm greater than the patient’s femoral head typically results in a more accurate acetabular component size. Acetabular components that are more than 5 mm greater than the patient’s femoral head can cause iliopsoas impingement. If surgeons use acetabular components that are more than 5 mm greater than the patient’s femoral head, they should medialize the socket and increase the anteversion to prevent the acetabular component from irritating the iliopsoas tendon. Acetabular components with more porous surfaces (3D-printed cups) are at greater risk of iliopsoas tendonitis.
Insert acetabular reamers sideways.
I learned this trick from Stefan Kreuzer. I use a Kocher instrument to insert the acetabular basket into the hip joint sideways and at a lower profile. The reamer profile area is cut in half, making it easier to get the reamer in and out of the hip joint with less muscle damage. Once the reamer basket is in the socket, I rotate the basket 90 degrees so I can attach the reamer shaft to the basket. I do the same thing with the acetabular implant. I insert the acetabular component into the acetabular socket sideways, rotate the component 90 degrees, and then attach the acetabular impaction handle.
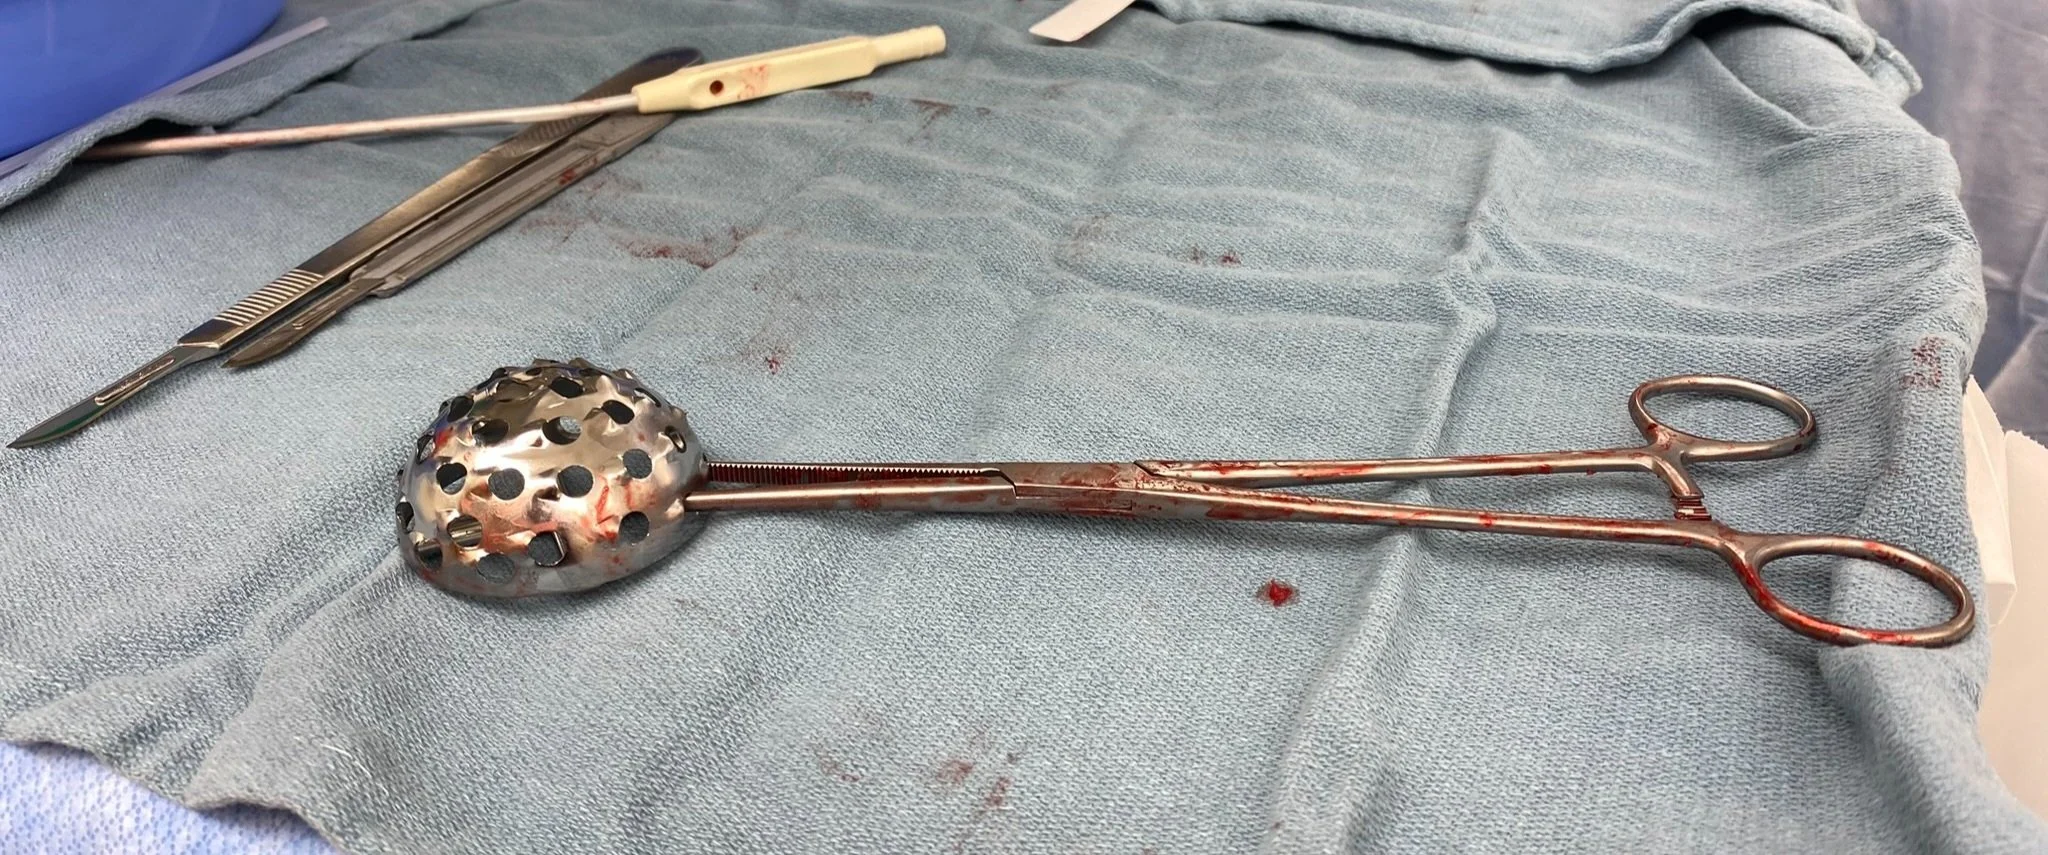
Fig. 8 - Reamer basket on Kocher
Ream socket once with Fluoro.
I used to ream the acetabulum with 3–4 reamers. Now, I ream once with one reamer that is ~4 mm greater than the patient’s femoral head. I insert the acetabular reamer and get a quick fluoro image. I move this initial image to the other screen so I can reference it later. I pay close attention to the abduction angle of my reamer shaft and the depth of the medial wall (white line in Fig. 9). The angle of the reamer shaft determines the medial and superior positioning of the acetabular socket. If the acetabular component position is more superior on my templated x-ray, then I move the reamer shaft towards the leg. If the acetabular component is more medial on the templated x-ray, then I move the reamer shaft away from the torso. I try not to change the abduction angle of the reamer shaft while I ream. I stop reaming when my reamer basket has removed half of the medial wall (yellow line in Fig. 9) and the acetabular reamer position matches the templated acetabular component position.
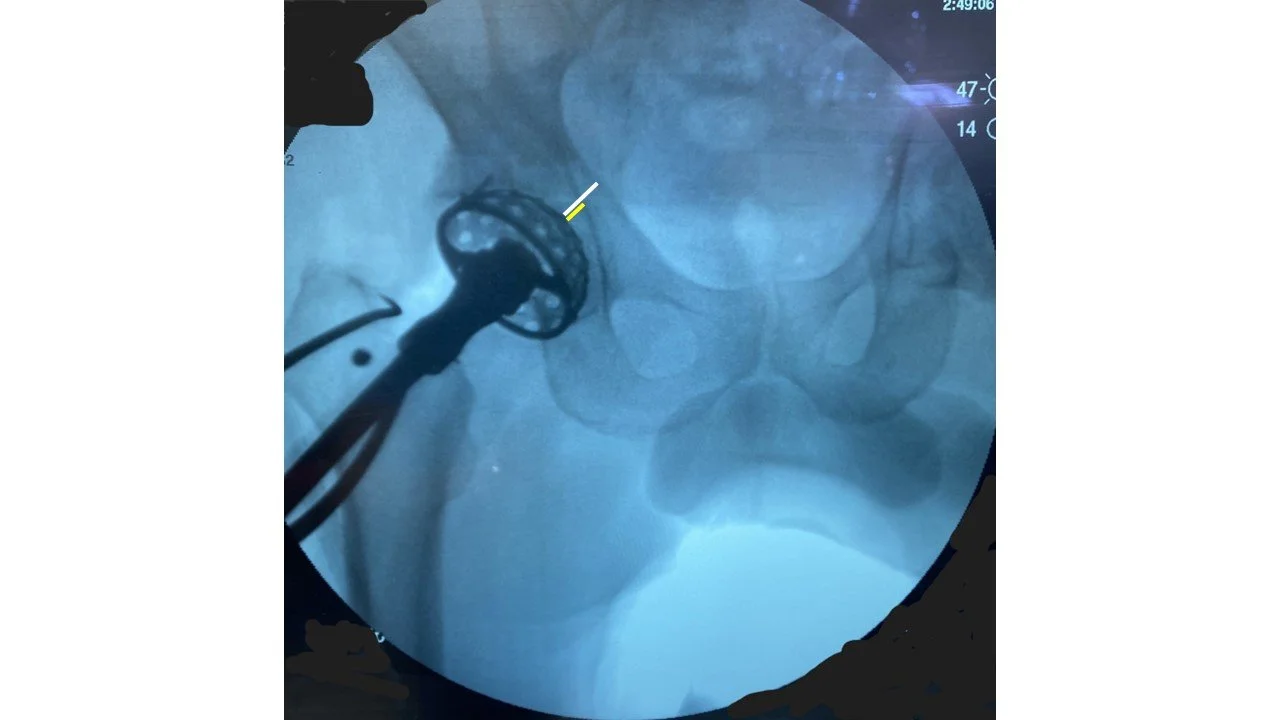
Fig. 9 - Reaming the acetabulum under fluoro
I want the anterior edge of my acetabular socket to be just inside the anterior acetabular wall. On the fluoroscopy image, I mentally draw an imaginary line from the top of the obturator foramen to the lateral edge of the acetabulum (Fig. 10). This line is an approximation of the anterior acetabular rim. I then make sure the cup anteversion and abduction and the reaming depth are appropriate on the fluoro image so that the acetabular component is tucked under this line that approximates the anterior acetabular rim.
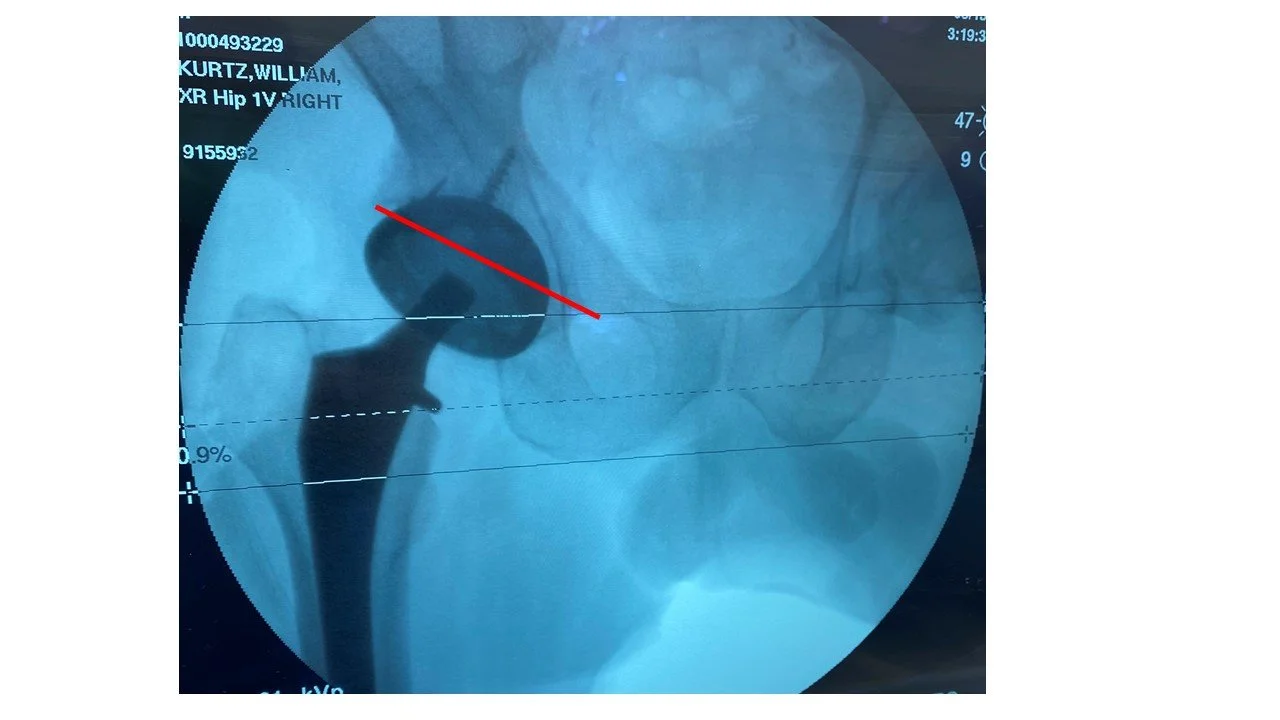
Fig. 10 - Approximation of anterior acetabular rim
How to elevate the femur for broaching
Elevating the proximal femur out of the surgical wound for broaching is all about getting the greater trochanter to clear the ischium. In order to avoid trapping the greater trochanter behind the ischium, the surgeon needs to pay attention to the order of their actions. Externally rotating the femur can trap the greater trochanter behind the ischium and therefore should be done last.
While exposing the femur, the surgeon should start with the leg in neutral rotation and neutral extension. The surgeon should then place the hook under the femur and manually pull the femur lateral and anterior as much as possible using the hook. The surgeon attaches the hook to the table lift to elevate the proximal femur anteriorly. The surgeon can then externally rotate the femur and then slowly lower the leg into extension. The surgeon can then release the posterior capsule and/or piriformis at this point. If the greater trochanter gets trapped behind the ischium while the leg is lowered, then the surgeon can do more releases. By raising and lowering the leg while maintaining a lateral and anterior force on the femur, the greater trochanter will elevate without getting trapped behind the ischium. If the surgeon tries to broach the femur while the trochanter is still tapped behind the ischium, they may break the femoral bone.
Avoid Confirmation Bias
Surgeons are confident by nature, but sometimes we are too confident. Confirmation bias occurs when everything seems to be going exactly as we planned and we fail to critically examine our intra-op data (fluoro image, measurements, etc.) to detect any deviations from our templated plan.
The most important way to avoid confirmation bias is to consider how our biases might affect our intra-op decisions. Confirmation bias often impacts how the surgeon selects their final femoral head ball length. The surgeon may have an idea about which femoral head length to use. They do a trial reduction with their chosen femoral head length. They are so confident that their decisions are correct that they don’t consider using a slightly longer or shorter head ball.
Ways to avoid confirmation bias are to:
Always trial with a femoral head that is not the intended length.
Allow someone other than the surgeon to select the trial femoral head. If the surgeon did not make the decision on which head to trial, they will be critical of the other person’s decision and carefully analyze the fluoro image.
Do not tell the surgeon which head ball they are trialing. The surgeon will be hyper-critical of the neck length if they do not know which head ball they are trialing. This is not a practical solution for every case, but I recommend every surgeon do this at least once to realize how critical they are when they do not have any preconceived idea about whether their decisions are correct or not.
Mark your C-Arm location with the bovie pad on the patient
After I obtain my first fluoro image, I place my bovie scratch pad on the surgical field, just under the inferior edge of the fluoroscopy unit. I point out to the x-ray tech where this bovie pad is relative to their fluoroscopy unit. When the x-ray tech pushes their fluoroscopy unit back into the surgical field for the second and third fluoro images, they can simply reference the bovie pad. This reference minimizes unnecessary fluoroscopy use because the x-ray techs can reposition the c-arm in the same place without having to get multiple x-rays.
Spin lap in socket to clean debris
After reaming the socket, I stick a lap into the socket and use the reamer handle to rotate the lap on power inside the socket. This trick removes debris and blood from the acetabulum before implanting your cup.